Planting your garden from seeds is a terrific choice. Not only are seeds unbelievably less expensive than store-bought seedlings, seed packets are your portal to a world of seemingly endless plant varieties.
Planting from seeds is simple to start too; a humble seed tray and a south-facing window is a surprisingly effective combination. In other words, you absolutely don’t need a dedicated system complete with grow lights, heat mats, and timers to start planting from seeds!
So, why did we build a dedicated seed starting station? And why might you want to?
Why You Should Build A DIY Seed Starting Rack
Reason 1 - Total Control Over Growing Parameters
The only south-facing windows in our home are obscured by large trees. We could of course place the trays outside, but warm-weather plants like tomatoes won’t germinate here until late Spring, wasting literal months of growing time. And for finicky seeds, an environment where we can tightly control light, moisture, and temperature improves the germination rate.
Reason 2 - Maximize Garden Space Allocation
Starting plants indoors reduces the square footage we have to allocate in our garden to tiny seedlings until they actually need the room. With a large indoor system, we can time our plantings so that as plants outdoors reach the end of their lifecycle, we’re ready to replace them with transplants.
Reason 3 - Cheaper than a Greenhouse
For larger gardens, growers with very cold winters, and commercial operations, a heated greenhouse might make sense. On our smaller plot with mild winters, a greenhouse is too expensive and takes too much space.
Reason 4- Fewer Leggy Seedlings
Leggy seedlings were our biggest issue when starting seeds on a windowsill or outdoors (particularly in the cooler months). An indoor seed starting system with grow lights is much more flexible; we can add additional lights or adjust the distance between the plants and the lights whenever we want.
Do any of our reasons ring true for you too?
In this seed starting system build guide, we’ll go through the full list of required parts, instructions on how to assemble them all together, and a real-world budget breakdown. Lots of photos are included in the assembly section to help make each step clear!
Side note: this is a super easy DIY project. No advanced handyman skills required =)
DIY Seed Starting System Parts List
Before you start buying parts, take a minute to consider what exactly you want to accomplish with your setup. Your exact choice of components should vary based on your answer to these questions:
- How many seedlings do you want to grow concurrently?
- How large do you plan to let your plants grow before transplanting?
- How much space can you dedicate to the system?
- And, of course, what’s your budget for the project?
With the answers to these questions in mind, let’s run through an overview of each item on the shopping list.
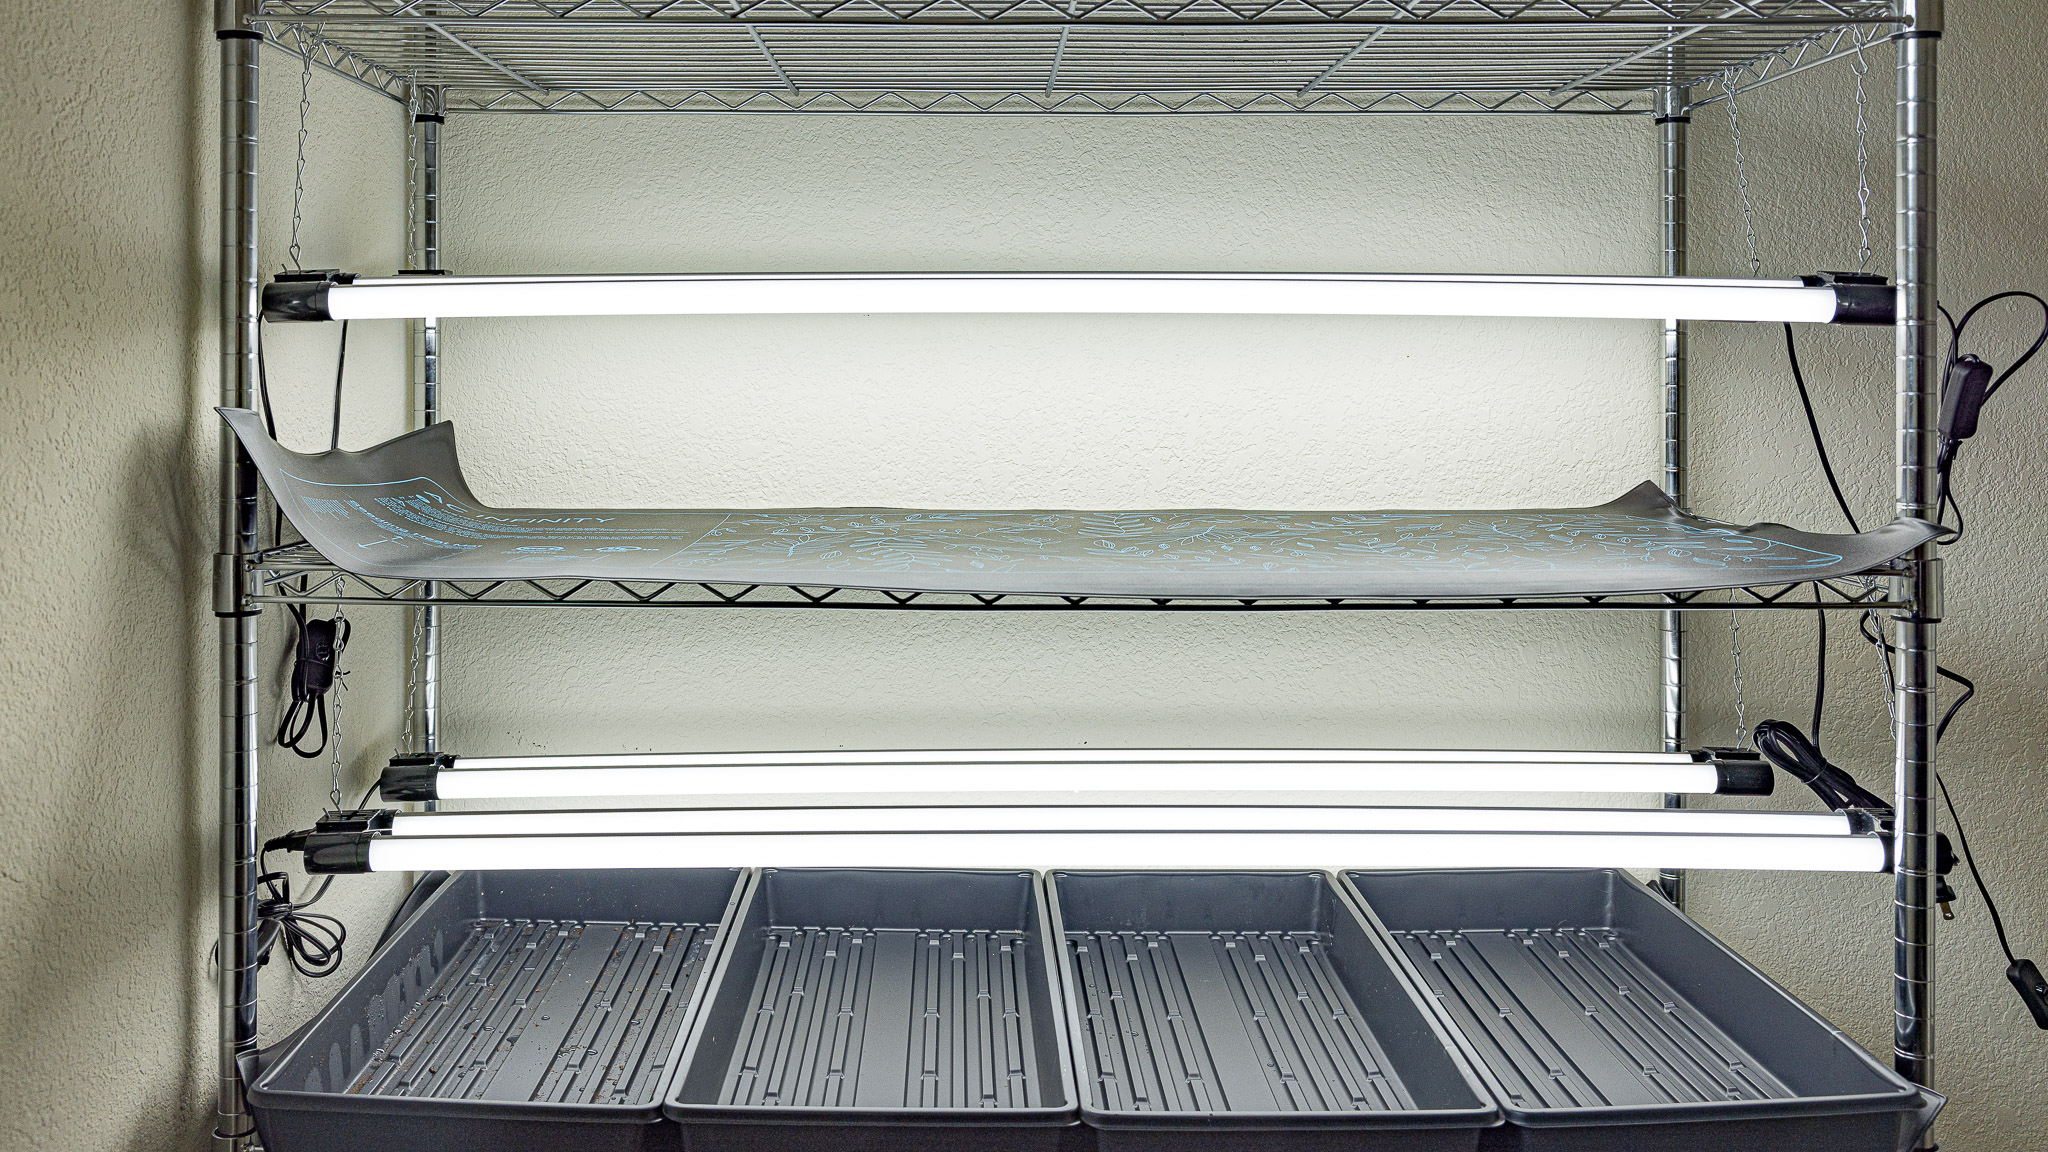
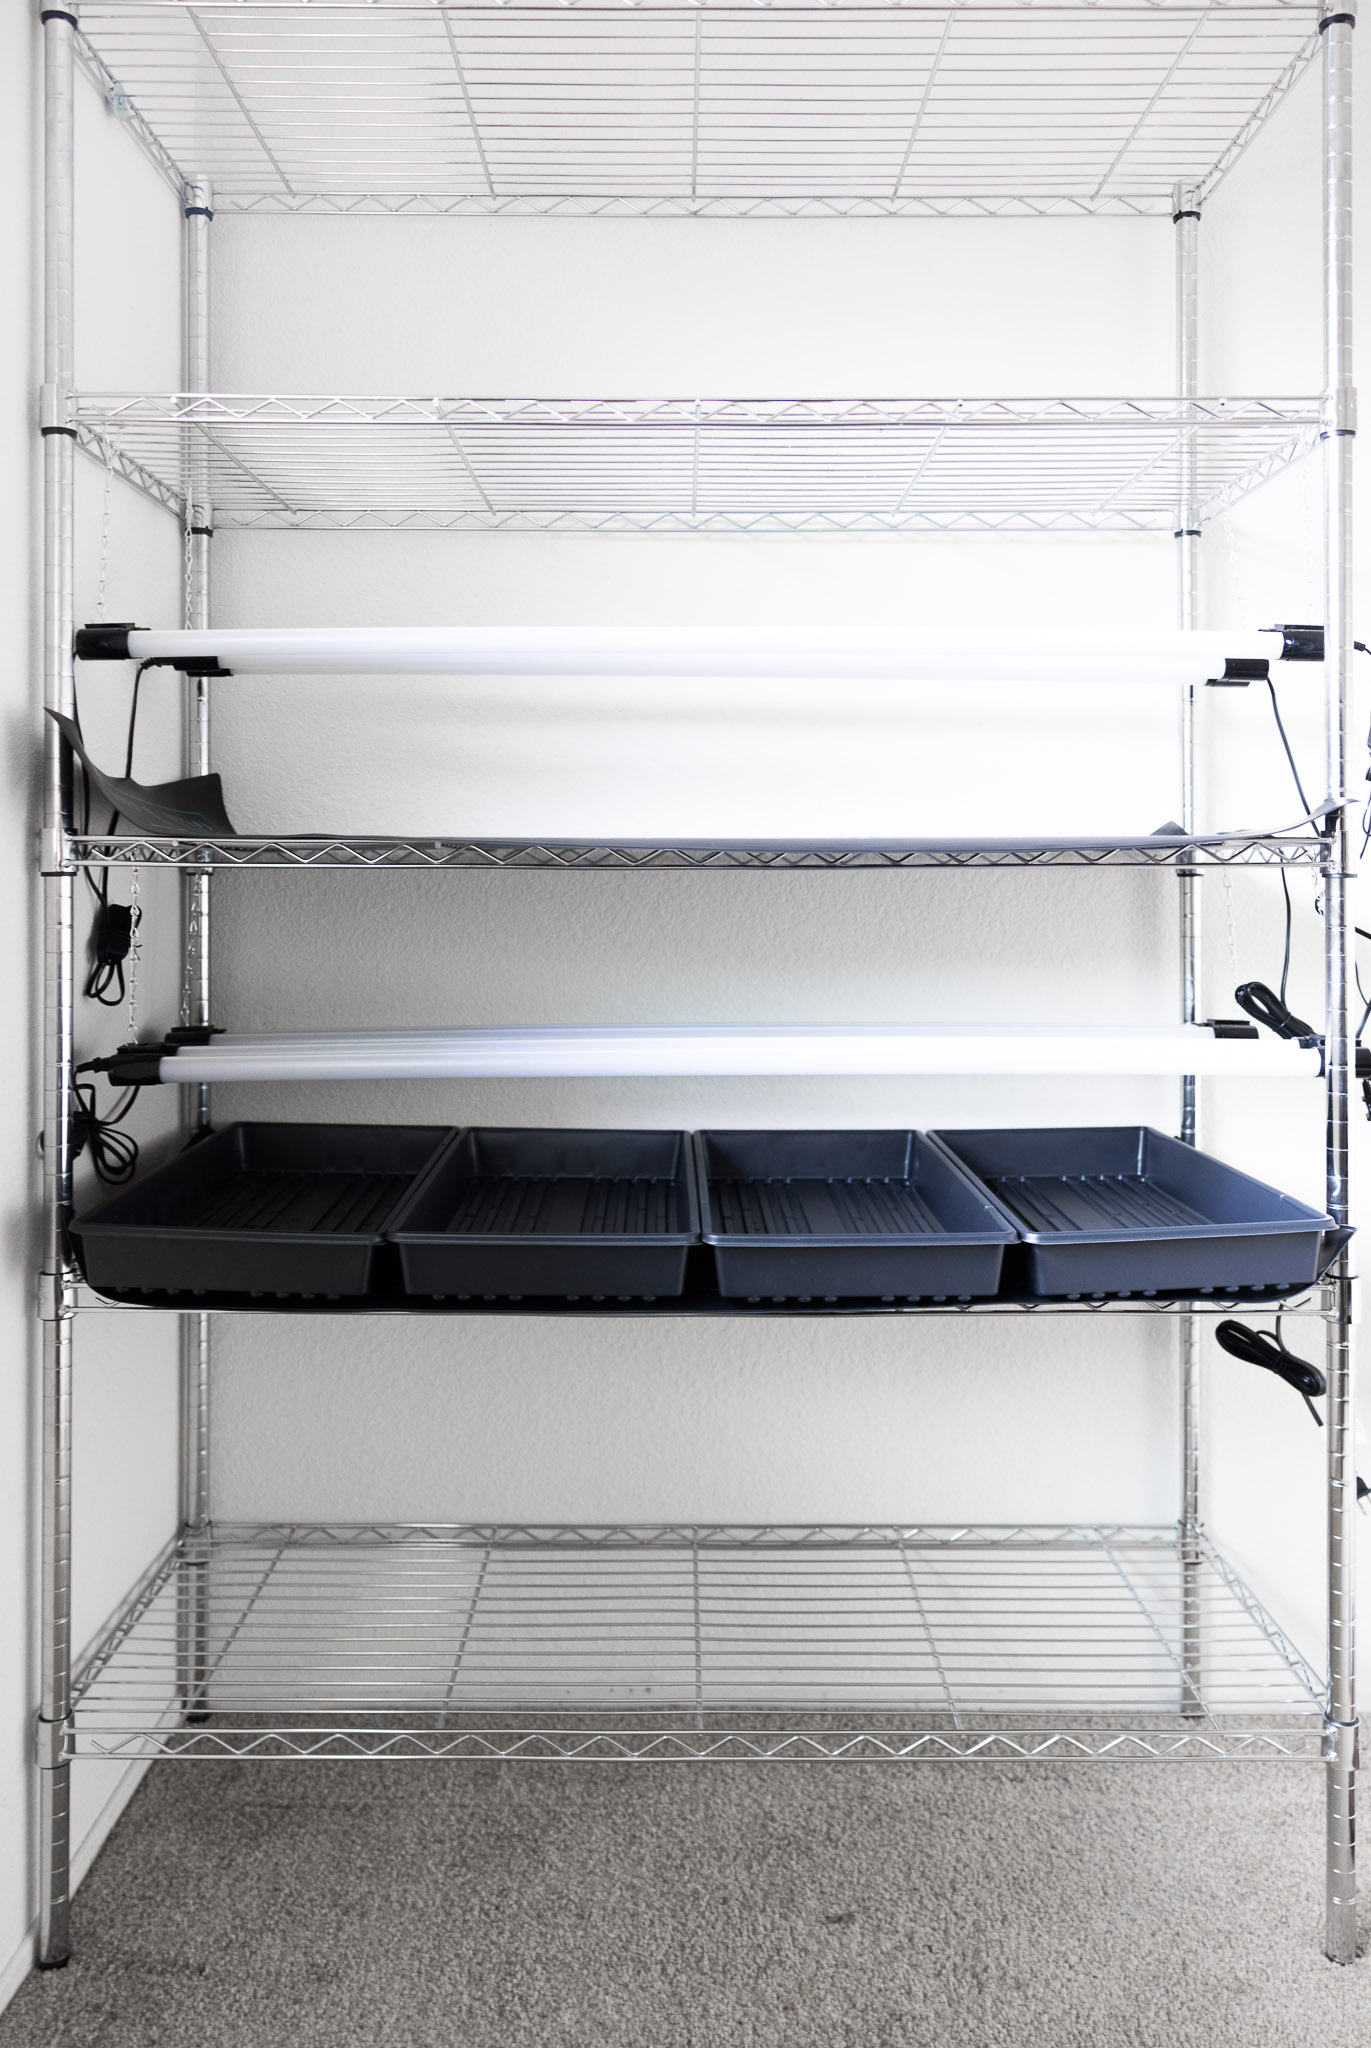
Shelving Unit
The main structure of our system is a basic shelving rack. Sturdy metal wire setups like this one are the most popular option. They can safely hold lots of weight and provide more airflow than a solid wooden shelf.
If you do go with a wire rack, the most important variable is size. Make sure that you purchase one with dimensions to match your lights and seed trays.
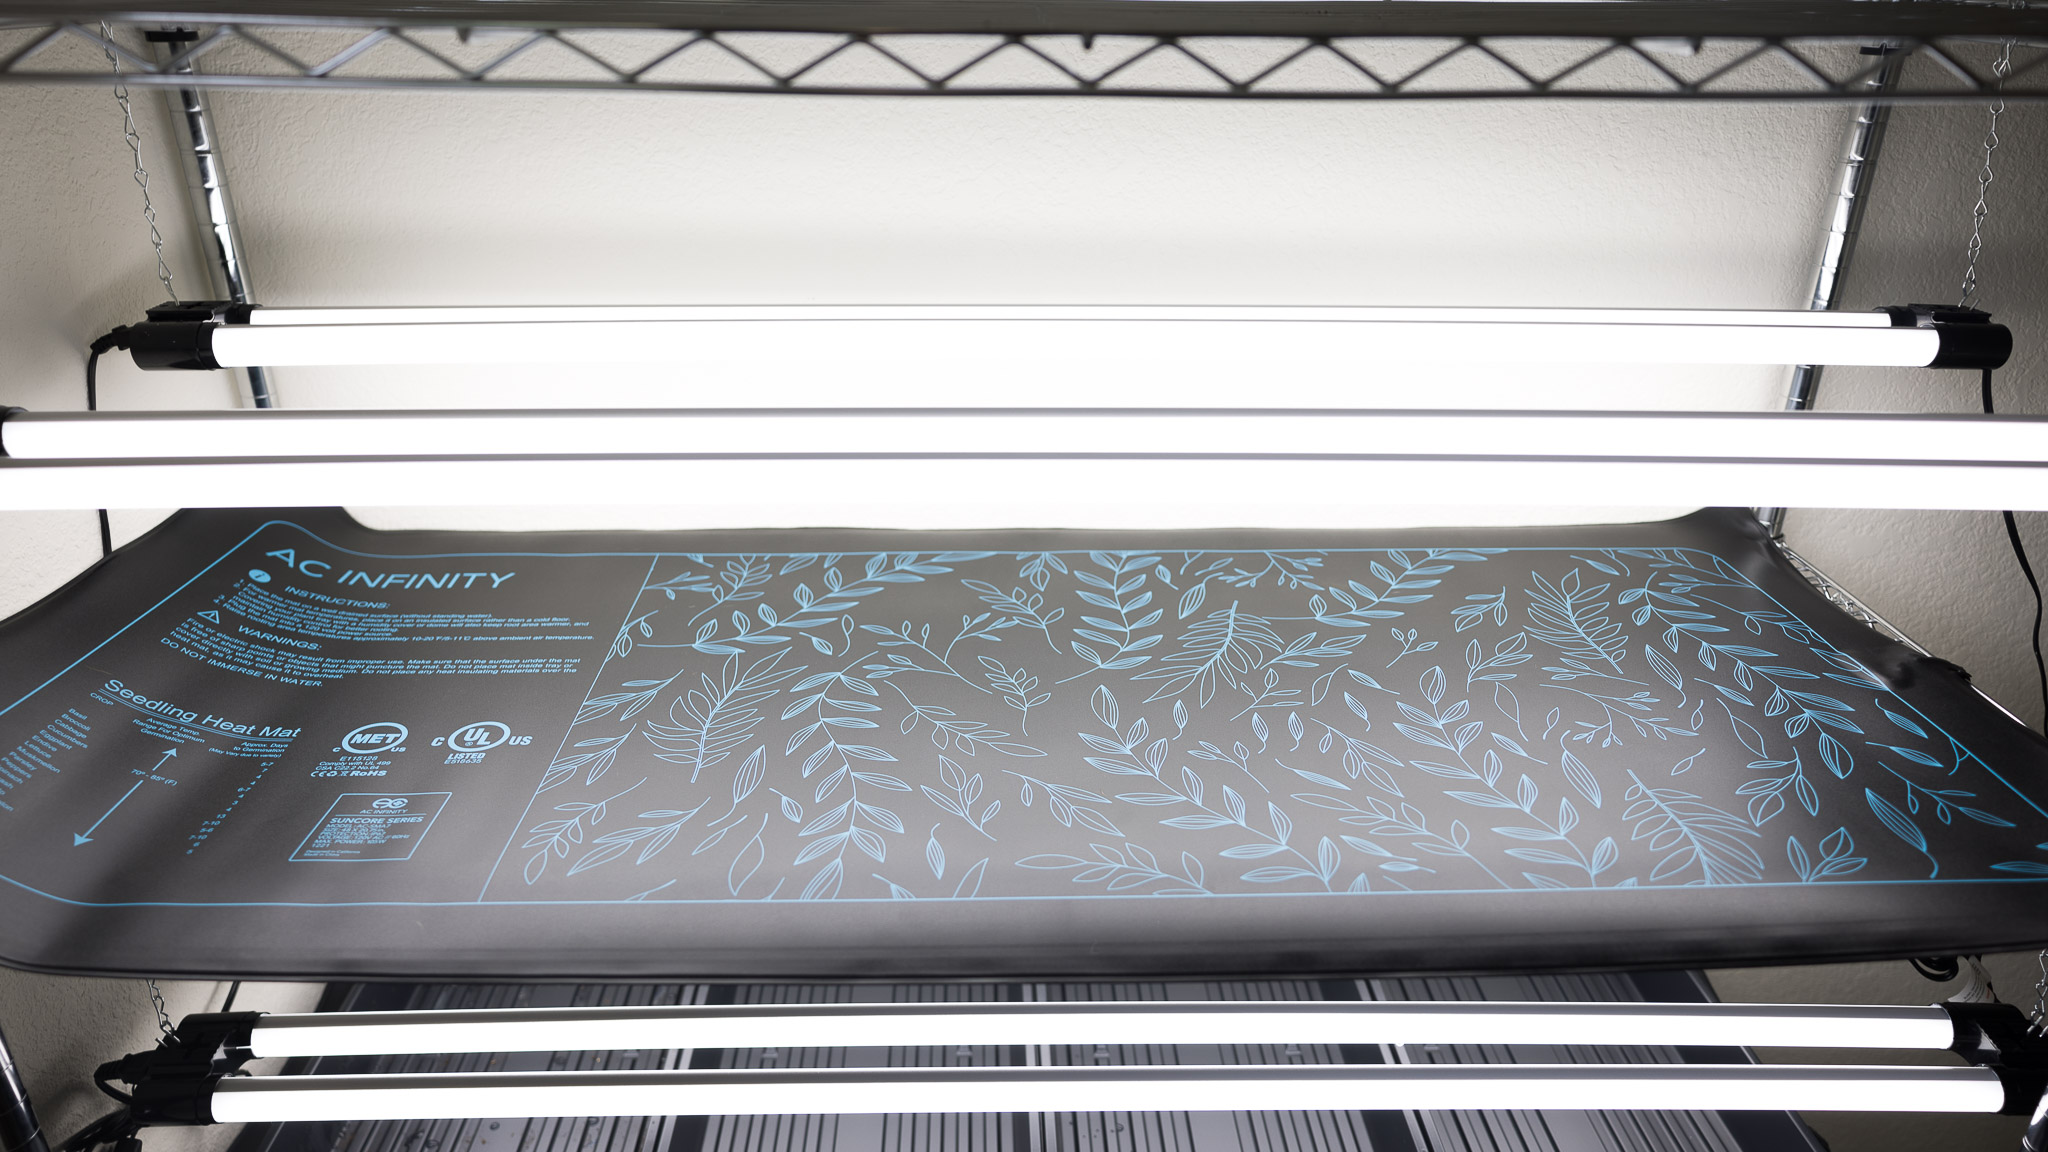
For example, we selected a relatively wide and tall (48” in. wide x 72” in. tall x 18” in. deep) unit with five total shelves. With these dimensions, a single shelf easily accommodates multiple 4’ ft. long LED lights, a 48” in. x 20” in. heat mat, and up to four standard 10” in. x 20” in. seed trays.
A single shelf also comfortably holds 48 3.5” in. pots - great for plants like tomatoes and peppers that should be kept indoors long past the point they can stay in a small seed tray cell.
No matter how much capacity you need, it’s worth running through the quick calculations to make sure your lights, heat mats, and seed trays will fit.
Important! I recommend waiting for a sale or finding a used shelving unit! We found that the price on the wire type shelves fluctuates a ton and we saved $60 by being a little patient.
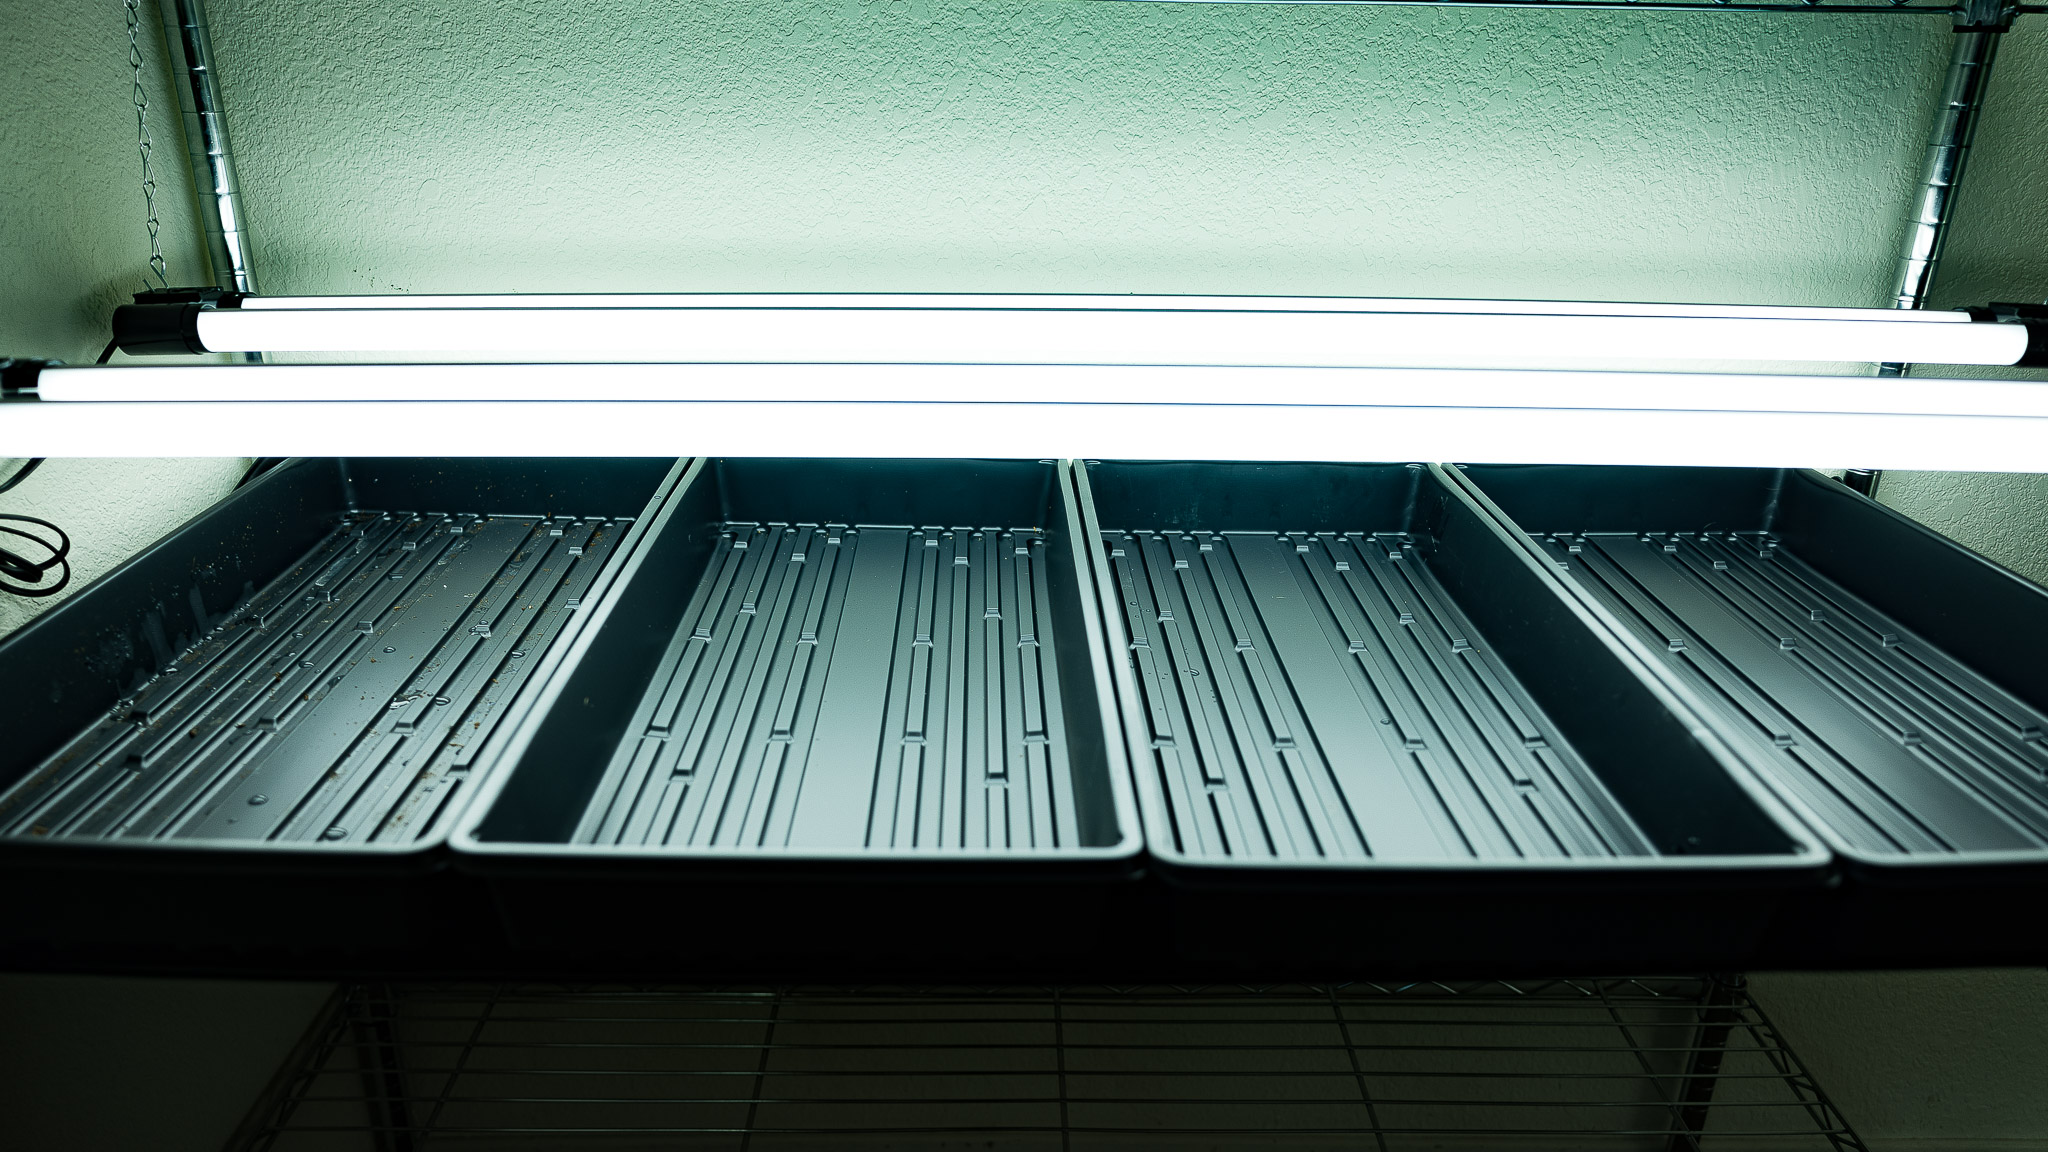
Grow Lights
Lights are by far the most complicated (and intimidating) piece of this DIY project. That said, if you aren’t interested in getting too bogged down in the math, selecting a super effective set of lights is… pretty darn easy. Here are the three basic options:
- If you plan to keep your plants on the rack for their full lifecycle instead of transplanting outdoors, consider purpose-made full spectrum LED grow lights. While effective, these are also relatively expensive and can be bulky.
- If you plan to transplant your seedlings outdoors on time, you can save money by using cheap LED shop lights. These aren’t appropriate for growing plants to maturity - especially fruiting plants like tomatoes.
- If you want a cheaper option, many gardeners still use fluorescent shop lights effectively. If you go this route, please be cognizant of the greater heat emitted by these lights and ensure that your setup can safely tolerate that heat. We prefer LEDs for the significantly reduced heat and electricity bill.
In terms of power requirements, look for lights with a minimum of 2000 - 3000 lumens per square foot of growing area per this handy guide from Washington State University. Make sure they’re between 5000 - 6500 Kelvin (assuming you are transplanting well before any plants reach the flowering and fruiting stages).
We currently run standard LED shop lights on two shelves and plan to add grow lights for the remaining two shelves soon. This should help us save money and reflect the fact that each shelf contains plants with significantly different needs. Our microgreens, leafy greens, and tomatoes are not the same after all!
If you’d like to delve a little deeper into the world of grow lights, check out this blog from Homestead and Chill. If you’d like to dive way deeper into the science of selecting a light source, check out this incredible article.
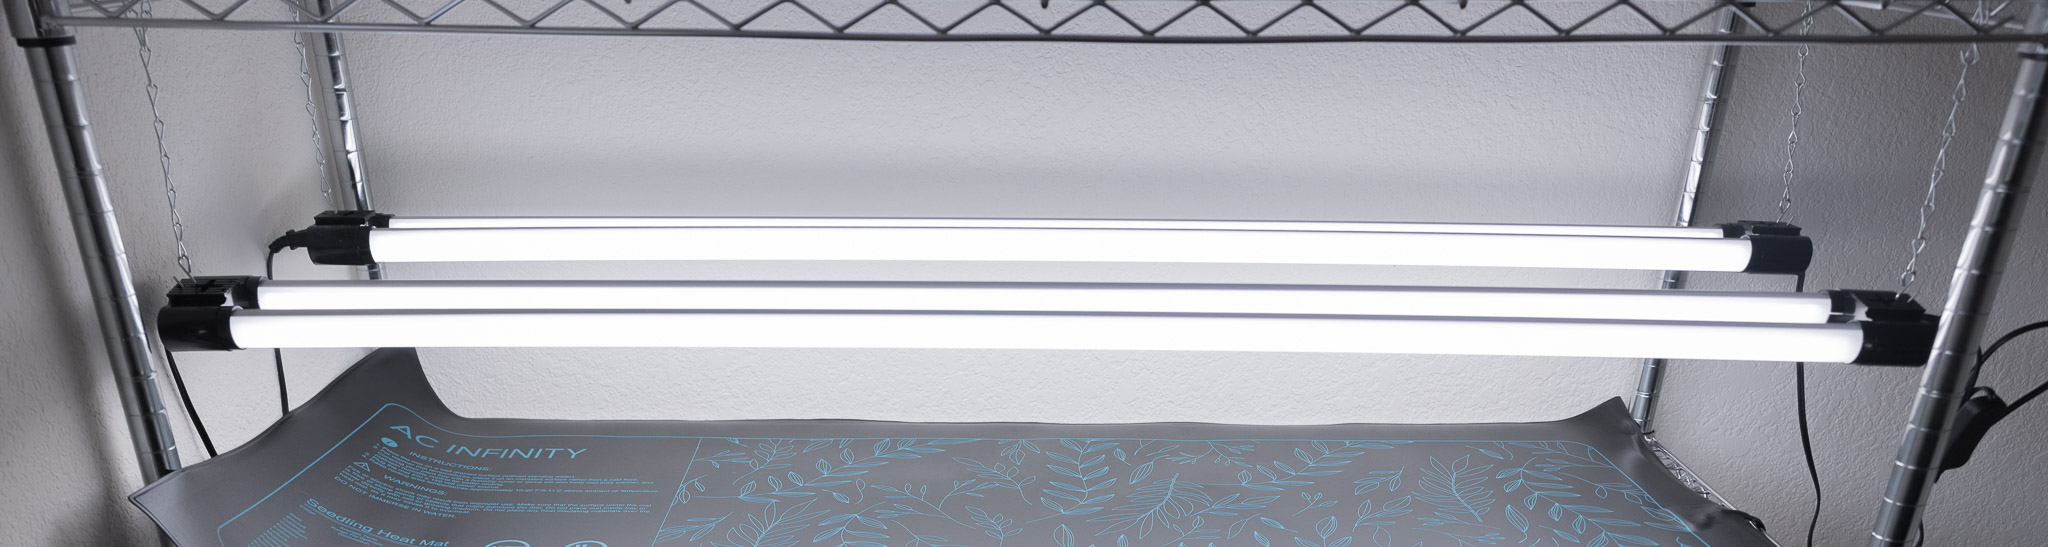
Light Fixtures
Your lights need to be hung in a manner that is safe according to the manufacturer’s guidelines. Full stop. That’s the most important piece. They must also be height-adjustable.
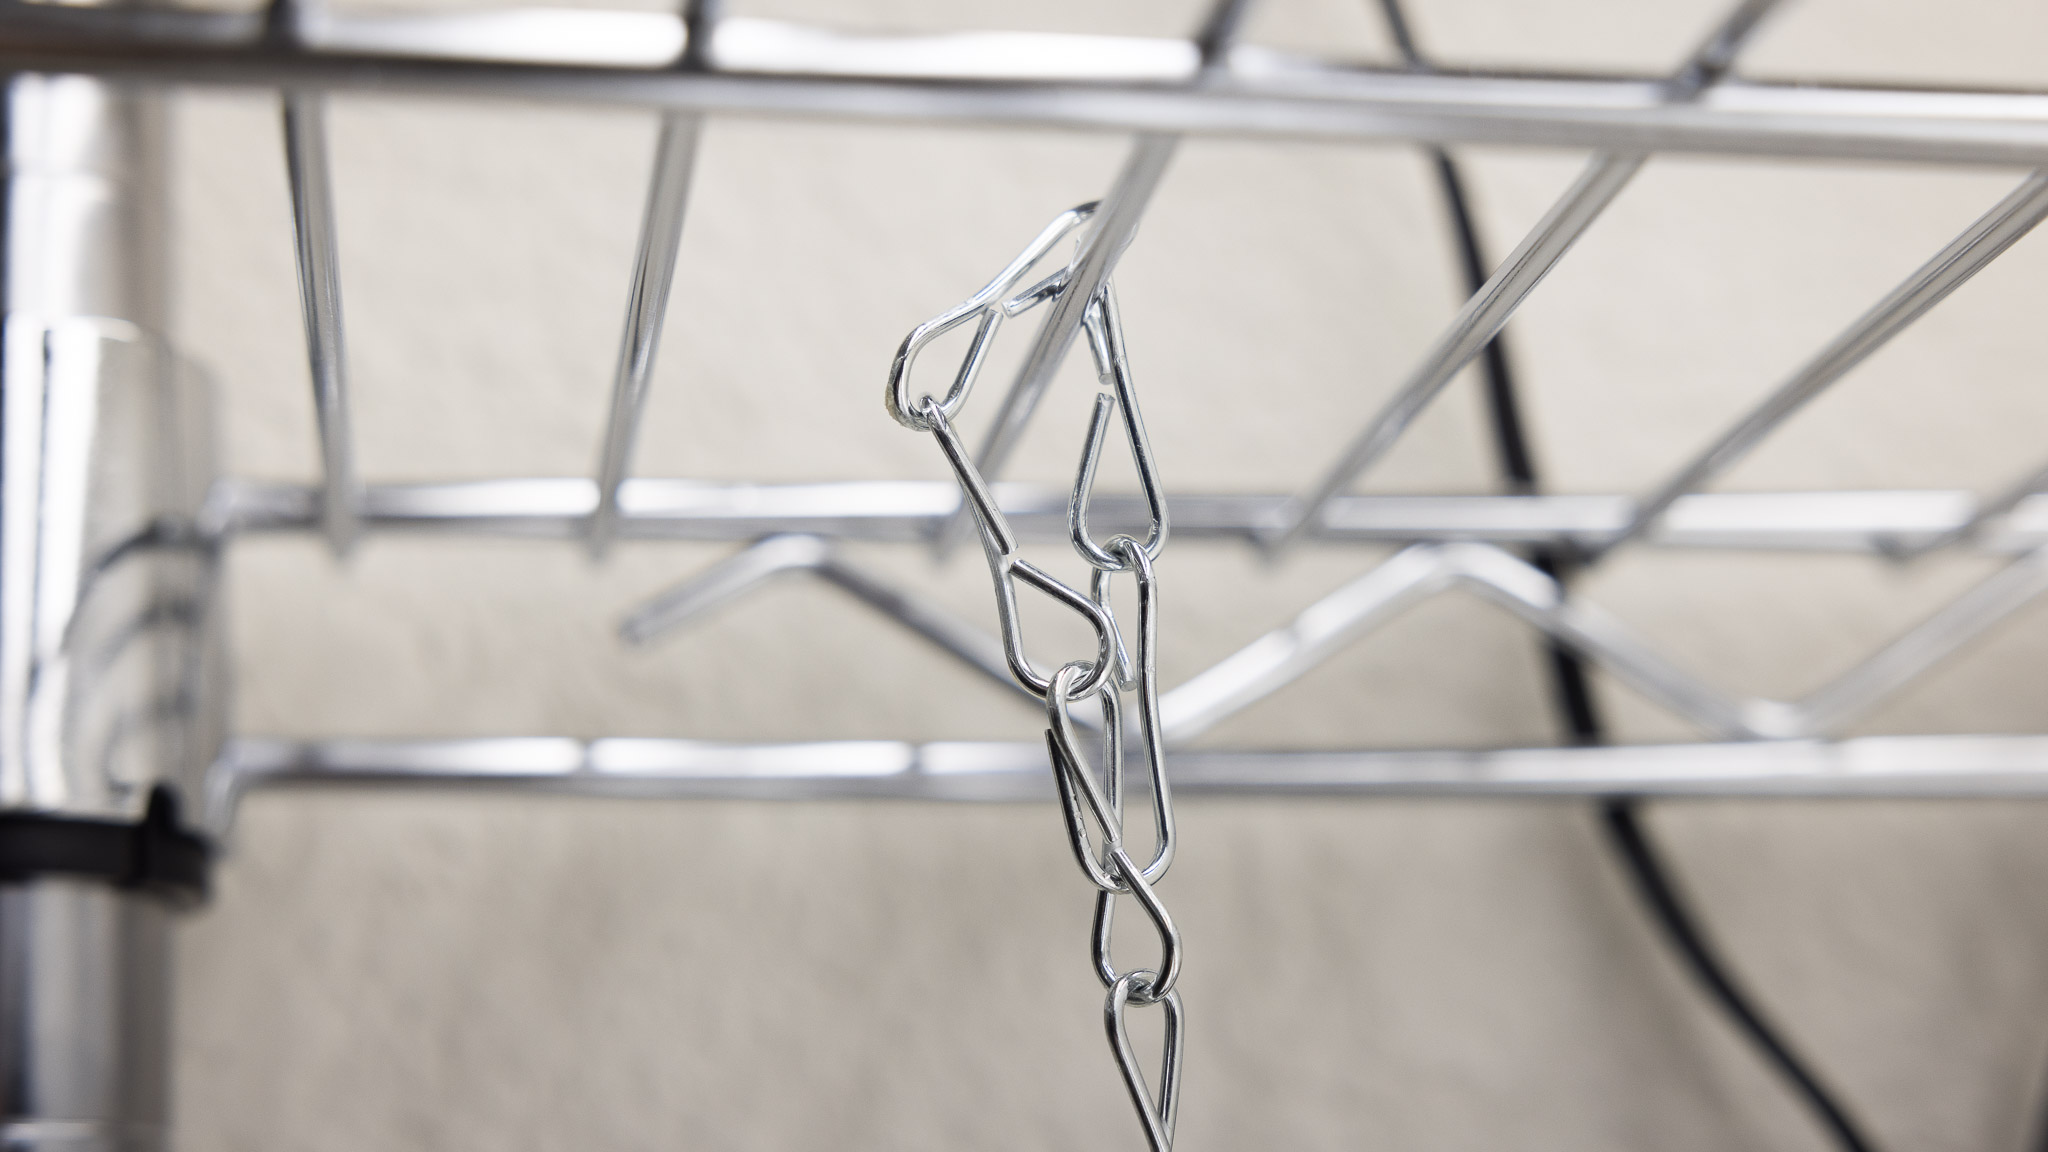
To achieve this, most gardeners opt to use chain link or another sturdy material to hang their lights from the shelf above. The exact setup is going to depend on the hardware your lights come with, but you may need to first attach the lights to a PVC pipe or board.
Simple S hooks like these can be helpful if you do need to make your own frame to hang the lights from. They’re particularly handy in combination with chain links as the two together make it easy to both hang your lights and adjust the height.
Seedling Heat Mats
Most seed starting systems benefit from seedling heat mats to aid germination. These mats are especially important for setups in cold areas of the house like the garage.
Check out this handy guide to germination temperature ranges to determine how many shelves (or individual trays on shelves) you need to heat. Note that even if your plants will germinate in cooler temperatures, a heat mat can often shorten your turnaround times.
Larger heat mats are cheaper by surface area so we opted for two large 48” in. x 20” in. mats that each cover an entire shelf. We keep one additional standard 10” in. x 20” in. heat mat handy to place under any standard tray as needed on the other shelves.
Fans for Seedling Airflow
One of the major benefits of an indoor seed starting setup is reduced disease and pest pressure. That said, it’s still easier to avoid the fungus that causes damping off if your soil surface is gently dried via airflow from a small fan like this one.
In addition to reducing fungus, airflow around your seedlings will make them more resilient once transplanted. Adding a fan won’t eliminate the need for a hardening off stage, but it helps.
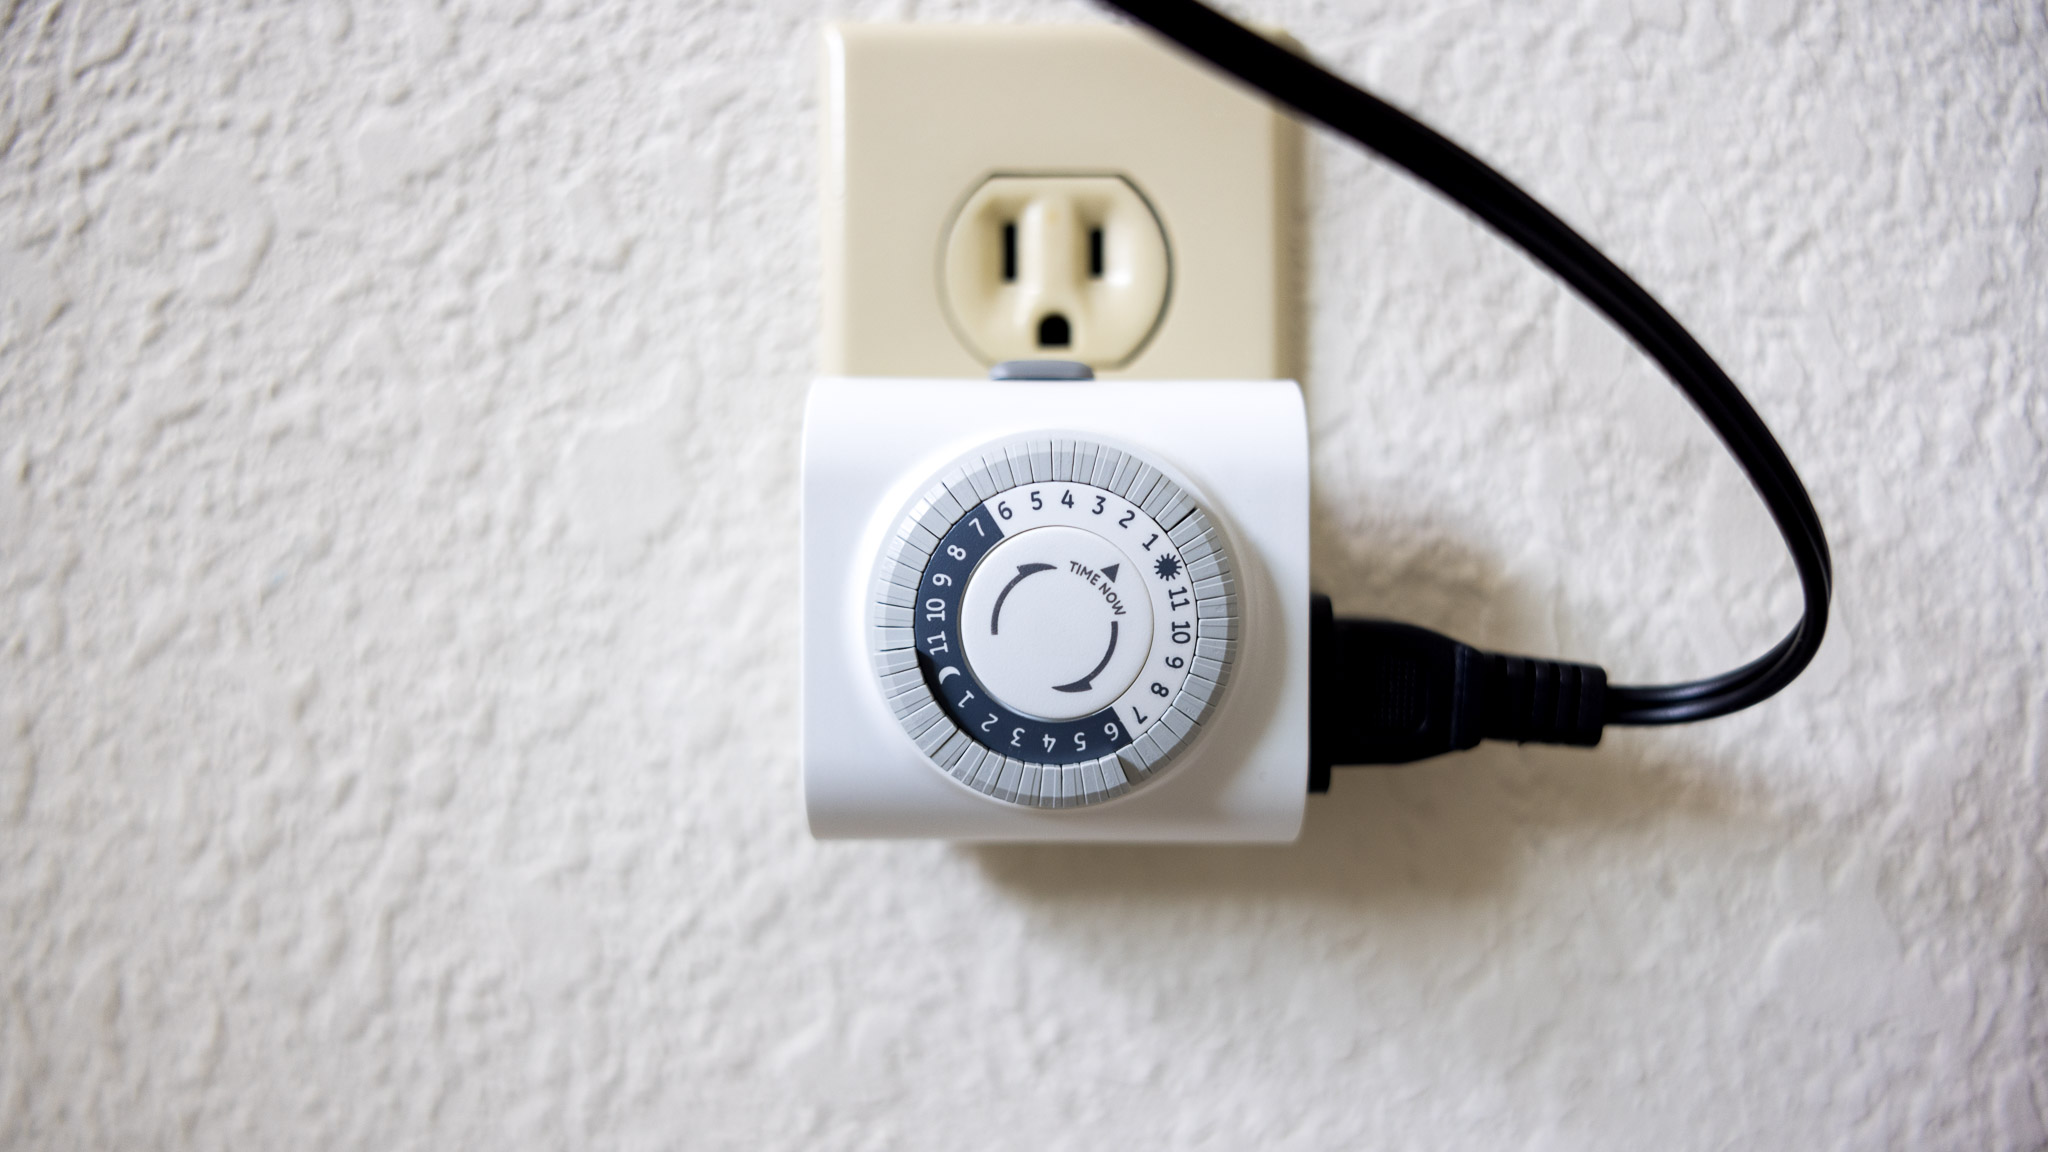
Mechanical Timer Plug
Healthy plants need downtime from the light. It’s generally not necessary to run your heat mats and fans 24/7 either.
A simple timer plug like this one makes it easy to automate your on/off cycle.
Assemble the Seed Starting Station
Got all your components ready? Let’s get building!
Step 1. Assemble the Shelving Unit
Most shelving units these days are very easy to put together, but keep a few things in mind:
- Do you want to put a waterproof tarp beneath the shelf to reduce the risk of moisture hitting your floors?
- Do you need the setup to be mobile on wheels?
- Where will the system be safe from young children/pets and extreme temperature but also not a nuisance? These lights are annoyingly bright if they’re in eyesight all the time!
We’ve opted to add additional furniture anchors to the one provided by the manufacturer to minimize any chance of tip over.
Step 2. Attach Lights to Brackets and Frame
Do your lights include hardware to safely hang and adjust them? If not, you’ll need a plan to add that functionality yourself.
Ours came with a simple set of chains with an S hook on one end to easily hang and adjust them. If yours did not (many don’t!), they probably did include clips to attach the lights to a DIY frame made of pvc pipe or another suitable material.

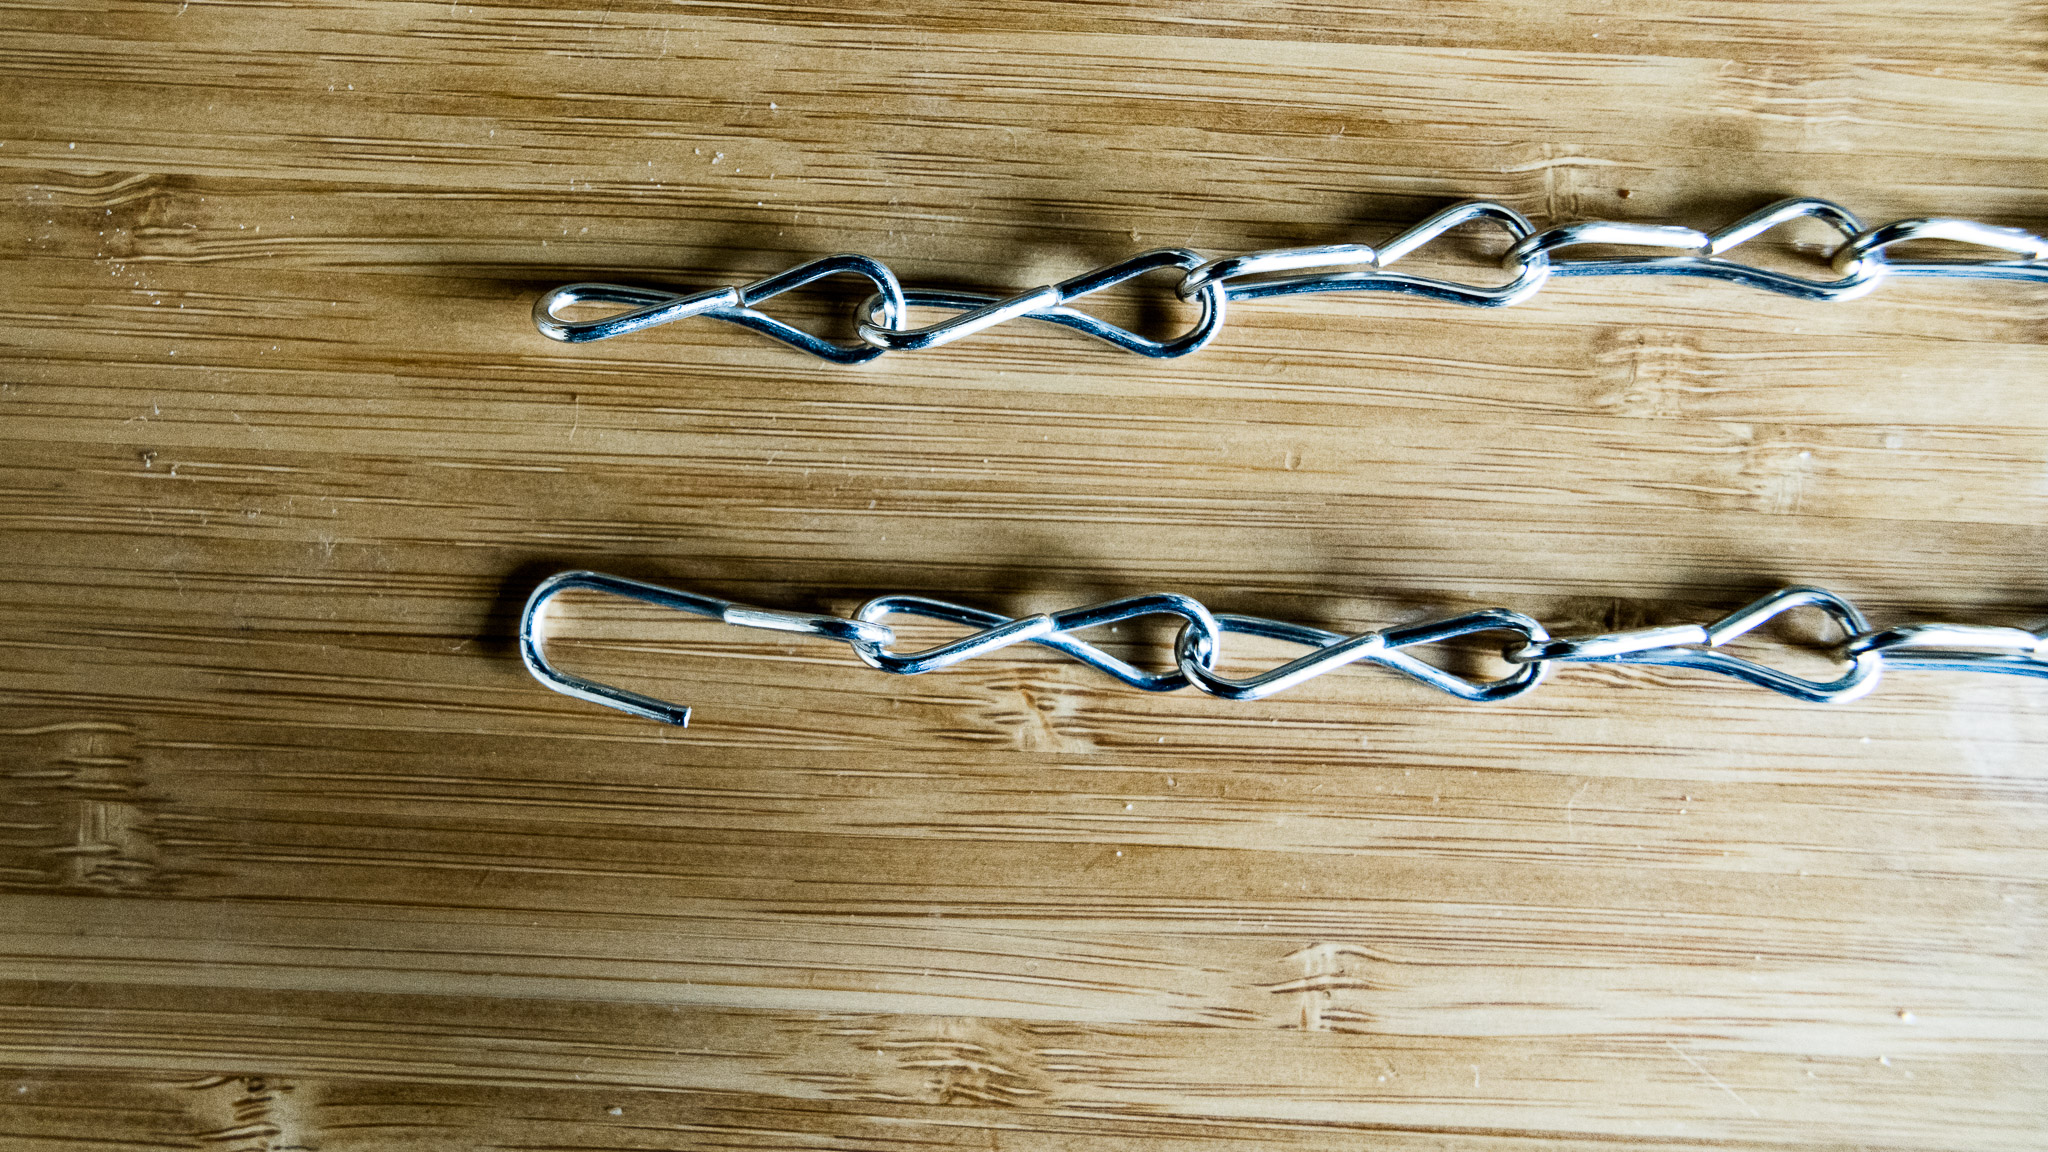
We also used pliers to gently open up the last link of the chain, creating a makeshift S hook on both ends. See the photo below for a before and after look at this. This step highlights another benefit of LED lights: their extremely lightweight construction makes them easy to secure in place.
Step 3. Securely Hang Grow Lights
The distance between the top of your plants and the light is dependent on the power of your light source. For instance, you may see photos of seed starting racks with fluorescent tubes mere inches from the plants. This design would result in major light burns if those fluorescent tubes were replaced with high-power LED grow lights!
We hang our LED shop lights about 4-6” in. above the top of the plants and monitor for etiolation (leggy seedlings) and signs of light burn so that we can adjust the lights up or down quickly as needed.
Once hung, it’s helpful to use a grow light meter app like Photone to check the actual light output reaching your soil line. We’re looking for PPFD numbers in the 100 - 300 range. Again, we can get away with lower output because we know our plants will be transplanted into the sun before they need more light.
4. Place Seedling Heat Mats
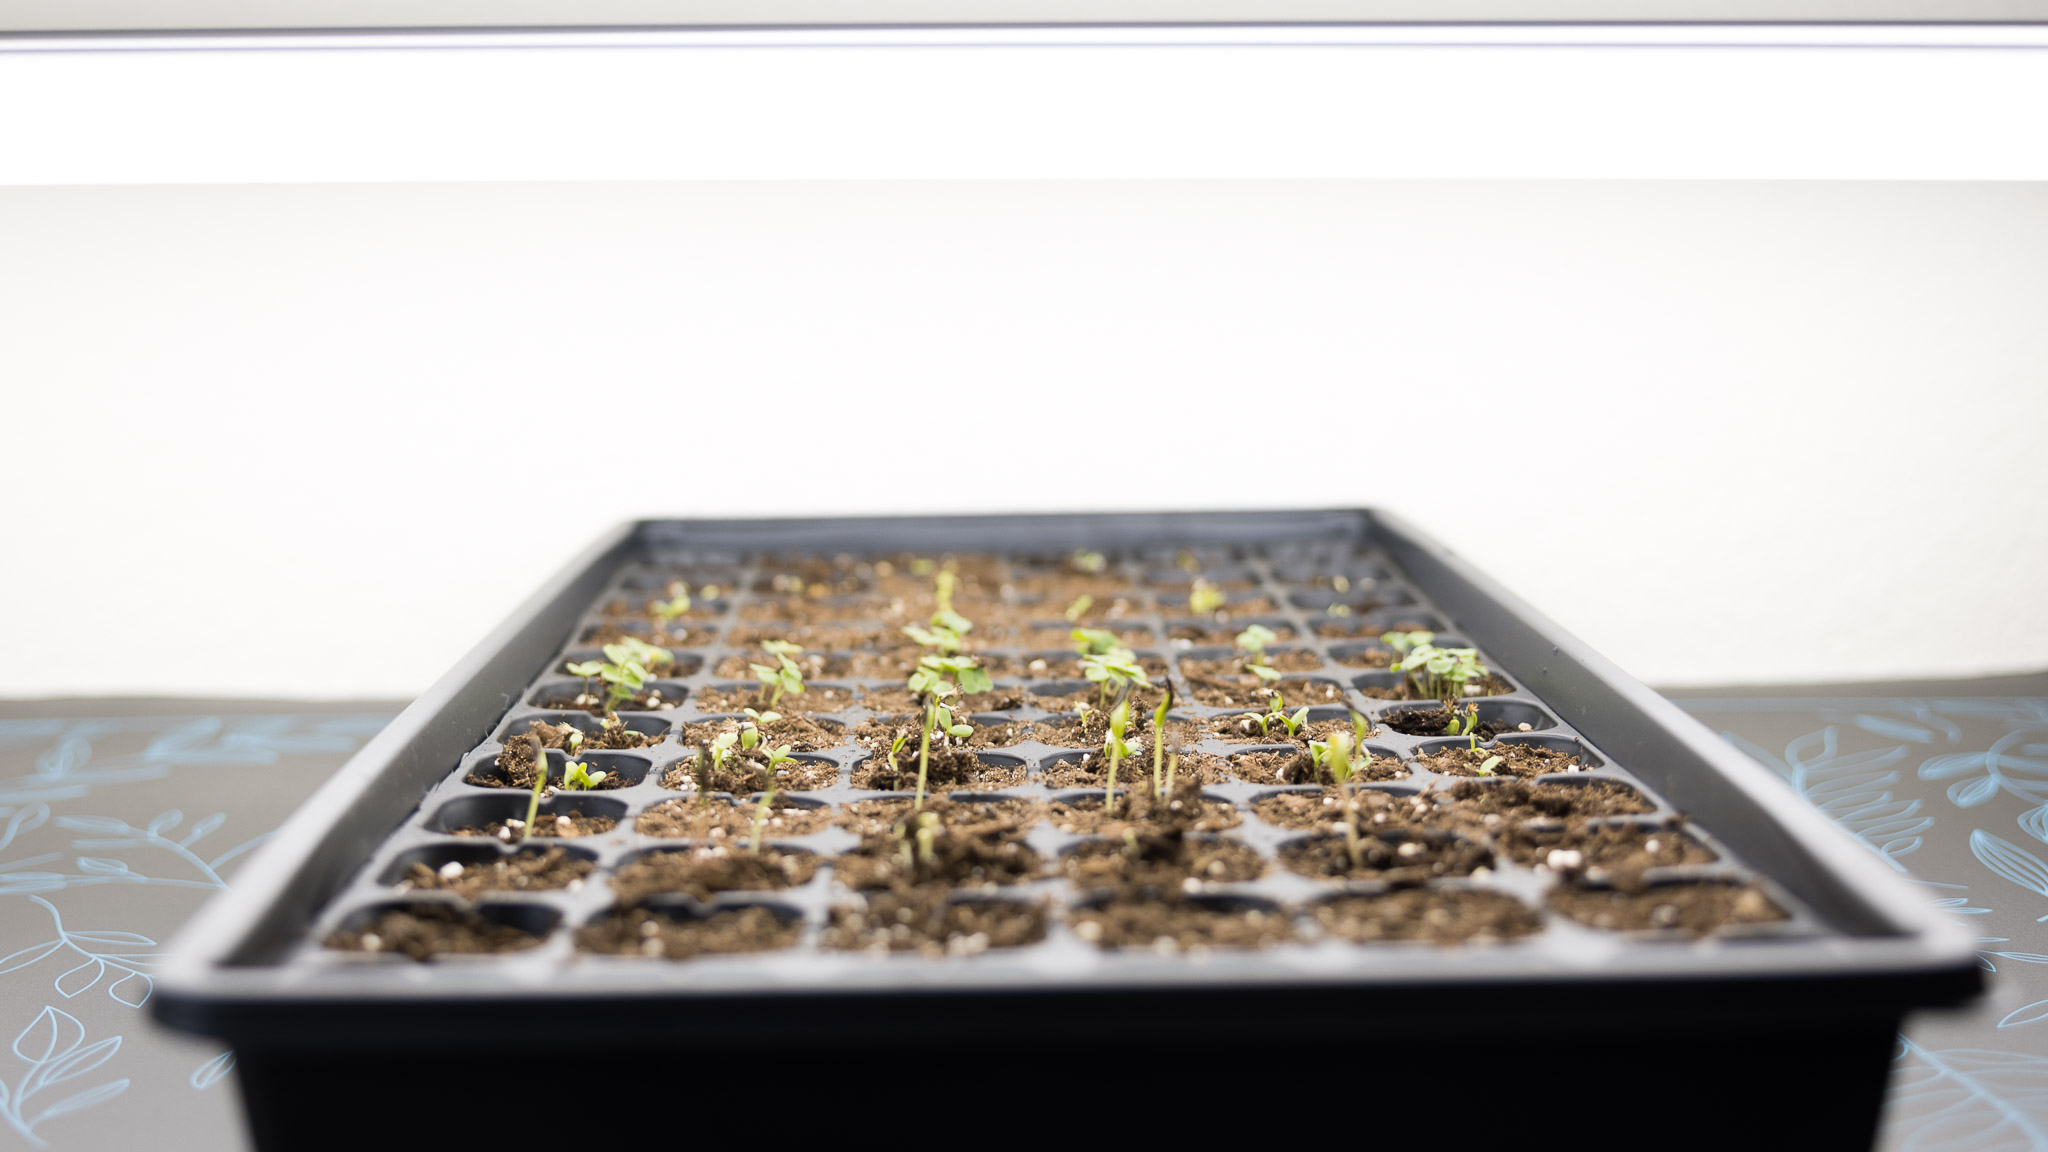
Set down your heat mats wherever you plan to start warm-weather plants. And remember that even cold-weather plants like lettuce will germinate significantly faster in warm soil. We just started a tray of flowers and leafy greens on a heat mat and are seeing germination in less than two days!
Note that all that beneficial airflow courtesy of the open wire shelf design leads to a ton of heat loss as well.
5. Add Fans to Seed Starting Station for Airflow
Position and secure your fans such that they will stay in place and provide gentle airflow across the surface of the soil in your trays and pots.
6. Plug Lights, Heat Mats, and Fans into Timer Plug
Set your timer plug to run for around 16 hours during the day with an off period at night. Simple!
Cost Breakdown
No good DIY project plan is complete without a sample budget! Here’s what we spent on our indoor seed starting system:
- Tall & wide wire shelving unit: $56 from Target on sale (no longer available, but very similar to many other options on the market)
- Four pack of LED shop lights: $50 from Amazon on sale
- Two 48” in. x 20” in. seedling heat mats: $46 on sale
- Timer plug: $5 from Amazon
- Two small fans: $16 from Amazon
- Additional furniture anchors: $5 from Amazon
Total cost: $178
You’ll find some of the items linked here have gone up or down in price, but this is an accurate reflection of what we invested. We also expect to spend a little more over time to add lights and potentially more heat mats to the system for additional capacity.
Hopefully you now feel comfortable designing and setting up your own indoor seed starting system! If you have any questions about how ours is working out or how we’ve put it together, please hit us up on Instagram!
As we ramp up our seed starting over the next month, we’ll release a followup step-by-step post on everything you need to know to start seeds on your new indoor grow light system. Update We wrote it! Available here.
Happy building!