So you’ve decided to level up your composting game and introduce worms into the mix? Well that’s fantastic news because worm composting (aka vermicomposting) produces not only fantastic nutrients for your garden - it’s extremely efficient! Both cheap to set up and maintain, vermicomposting is a perfect complement to a traditional compost bin and the backyard chicken flock for turning food scraps into beneficial inputs for your plants.
While there are a number of effective vermicomposting setups, this article will walk you through a cheap, effective, and super simple strategy. You’ll learn what to put the worms into, what to put all around them, how to feed them, the best kind of worms (yep, that’s a real thing), and how to keep them happy.
Read on to learn how to set up your worm home in less than an hour. Just add worms!
Worm Composting Container
The humble plastic tote makes an ideal first container to house your composting worms. While there are certainly benefits to larger setups that utilize large, plastic trash cans or multiple interconnected and stacked containers, the backyard gardener is going to get a ton of mileage out of a single tote. Especially as most of us have a standard compost pile and/or chickens to feed as well!
With the container ready to go, there are a few things you’ll need to do to make it perfect for your future worm army.
Worms like the dark and do not like sunlight. Make sure you keep the lid to your tote and put it back on after every feeding.
Worms (and healthy soil in general) need oxygen transfer. This means you must drill ¼ in (or slightly larger) holes into the top of the bucket and all of the sides. If you’re wondering how many, it’s hard to overdo it.
Worms also need soil that isn’t totally waterlogged. So take that drill and make additional holes into the lowest parts of the tote to allow liquid to drain out
Even if your worm bin spends time outside, you’ll likely need to bring it inside or into the garage during extreme weather. So place a pan with a high lip under the tote to collect the runoff (i.e. the leachate). Side note: the leachate generally isn’t appropriate to use as a gardening input.
Just like with your standard compost pile, poor airflow and too much liquid create conditions favorable for anaerobic bacteria growth. Which, in addition to being bad for the worms, is just really gross to be around.
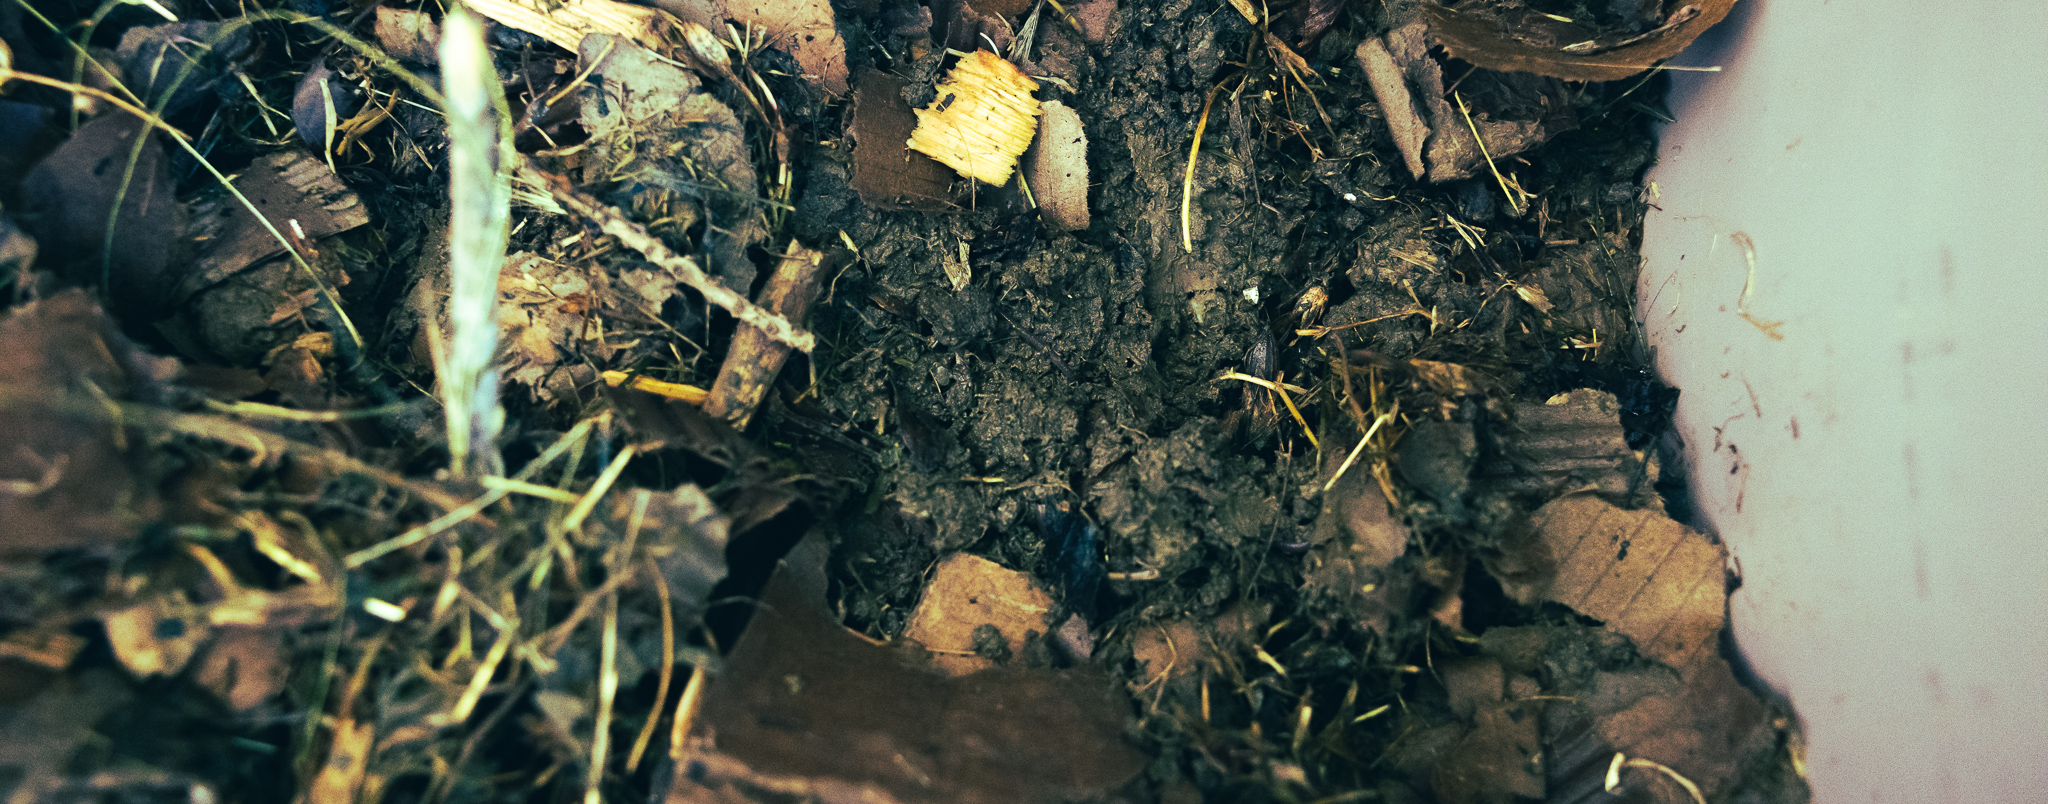
Worm Composting Bedding (AKA What to Put the Worms Into)
Your worms won’t last long in the empty tub with nothing but their food, so add some bedding for them to happily live amongst.
Some vermicomposters prefer to use partially-finished compost for this, but I generally find that most of us are too eager to use that particular resource directly in the garden. Instead, mix well-shredded cardboard or newspaper - avoiding any with a shiny finish and removing all tape and stickers first - with some of your native soil. Carbon sources like wood chips and fallen leaves are good to mix in as well. The worms need at least a few inches of bedding to inhabit and room to shallowly bury their food.
A warning to my fellow gardeners afflicted with really heavy clay soil: be sparing with your native soil in the worm bin. Clay soil can easily create a matted mess and doesn’t readily mix together with the other bedding components.
The Right Composting Worms
Surprisingly, not just any old worms are a good choice for an efficient composting bin. Earth worms and bait worms specifically aren’t worth the trouble.
Instead, get yourself some red wrigglers. These fine composting works work as a community to break down food and then move on. They also are able to live in higher densities, ideal for composting in a finite space like our worm bins. Yep, some worms are territorial, but not red wrigglers!
My preferred option for sourcing composting worms is to order them online and split the purchase with a fellow gardener. The worms themselves are the most expensive component of the whole endeavor but are much cheaper per worm if you buy a larger number and split the cost. Remember that your worms will reproduce rapidly over the coming months (as much as doubling their population in three months) in your bin so you can save money by buying fewer worms and exercising a little patience.
500, or ½ a lb. of red wriggler worms is a good starting amount that won’t break the bank and will leave room for the population to grow. If you’re eager to maximize your worm compost outputs as quickly as possible, go ahead and start with a full 1lb.
What to Feed Composting Worms (Red Wrigglers)
Your worm composting bin will function more efficiently if you add smaller items that are easier for the worms to break down. To do so, simply scoop out a shallow trench in the bedding, place the scraps in, and cover back up. Veggie scraps are ideal, but avoid salty foods, citrus, fatty foods like meat and dairy, or anything super acidic. Check out this awesome infographic for a handy reference guide.
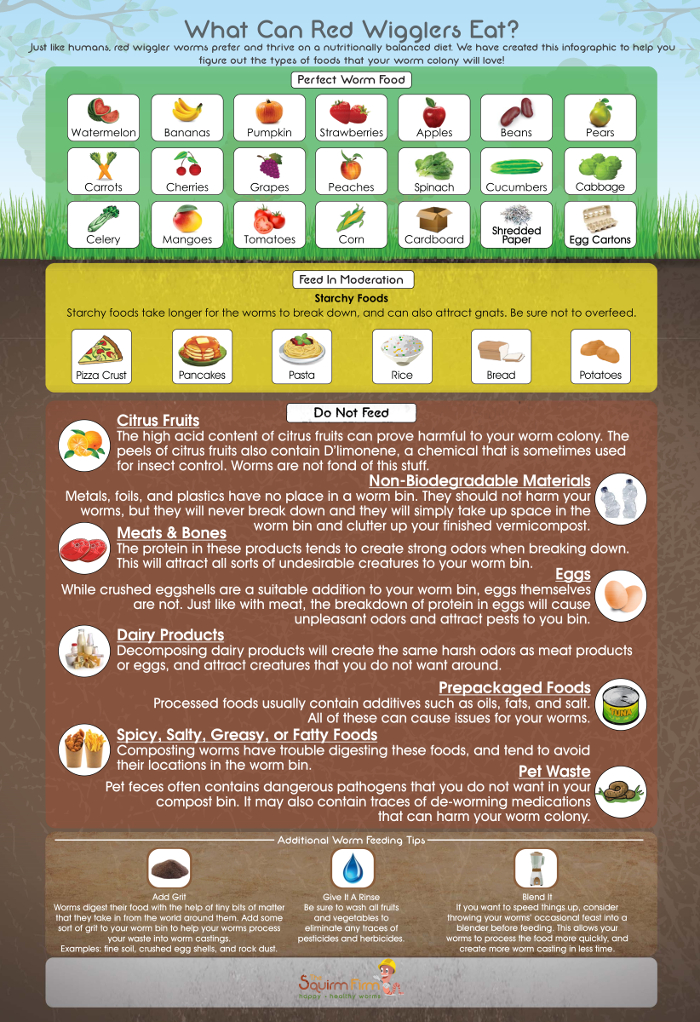
Red wrigglers eat about half their weight in a day and 500 worms weigh about half a lb. total. You’ll want to feed them about once a week and only the amount they consume in that time. This piece is important and frankly requires some monitoring and trial and error. You obviously don’t want to underfeed your delightful compost-producing worm army, but add too much food and it will rot before they can process it all.
Ideal Conditions for Worm Composting Bins
Vermicomposting is awesomely simple. Just keep these three things in mind for happy worms:
- The worm bedding must contain moisture but not be waterlogged.
- Your worms will do best in an area with temperatures above 55 degrees and below 75 degrees fahrenheit. Typically this means keep the bin out of direct sunlight and move it indoors or to the garage in winter and summer, depending on your local conditions.
- If the bedding is starting to look packed with worms and you notice the amount of food they go through each week has plateaued, congratulations! It’s time to split off some of your worms and start a second bin.
- If you’re noticing the food is rotting or attracting pest insects, either bury it a little deeper or reduce the amount provided per week.
Happy vermicomposting!